
Your cart
There are no more items in your cart
How to grow the tulip
Categories :
Chronology
, Ornamental
Index
Care and maintenance of tulips
FAQs (Frequently Asked Questions) about tulip cultivation
Introduction
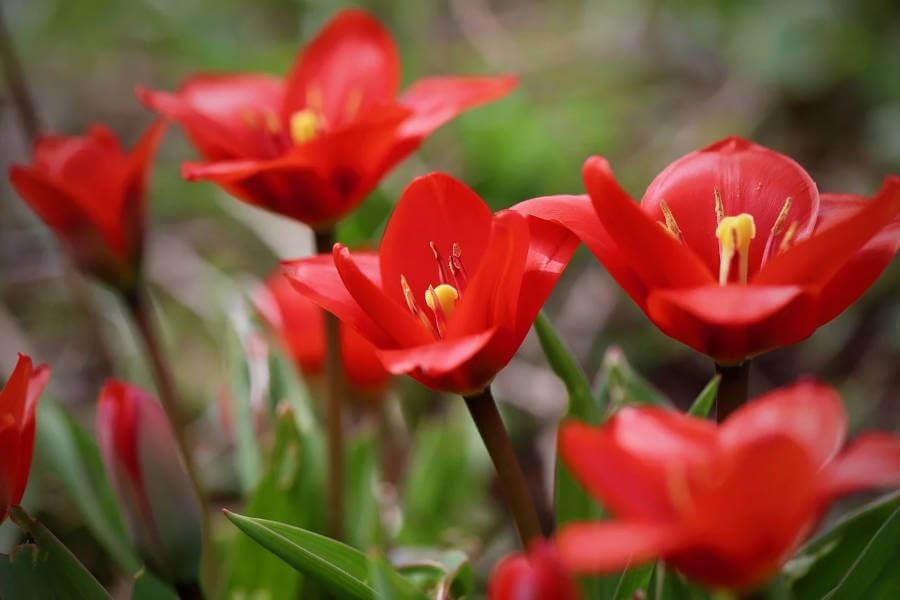
The tulip is one of the most popular and popular flowers in gardens around the world. A symbol of elegance and beauty, this plant is native to the mountainous regions of Central Asia, but has become an iconic symbol of the Netherlands, thanks to its intensive cultivation. The tulip belongs to the Liliaceae family , and is famous for its variety of colors and shapes. Growing tulips requires attention and care, but with the right techniques, spectacular blooms can be achieved that decorate gardens and balconies.
The choice of soil and climate
The first important stage for tulip cultivation is the choice of soil. Tulips prefer well-drained, organically rich and slightly alkaline soils . Soil that is too heavy or clayey can cause waterlogging, which damages the bulbs. To improve drainage, you can add sand or gravel to the soil.
In terms of climate, tulips grow best in temperate zones, with cold winters and cool summers. This is because the bulbs need a period of vernalization, i.e. exposure to cold, in order to germinate properly. Temperatures between 4°C and 10°C during the winter are ideal for tulip growth. Another aspect to consider is sun exposure: tulips need at least six hours of direct sunlight a day to bloom at their best.
Soil preparation
Before planting tulip bulbs , it is crucial to prepare the soil. It is recommended to work the soil to a depth of about 30 cm, removing stones and roots that could hinder growth. It is also useful to enrich the soil with compost or mature organic fertilizer, to ensure a good supply of nutrients during the growth phase. At this point, the soil should be well aerated and ready for planting.
When to plant bulbs
The best time to plant tulip bulbs is in the fall, usually between September and November. This allows the bulbs to root before the intense cold of winter arrives, thus ensuring lush flowering in spring. It is important that the bulbs are planted before the ground freezes, but late enough to avoid temperatures that are still too hot.
How to plant bulbs
The planting depth of tulip bulbs is crucial for their proper development. In general, the bulbs should be planted at a depth of about 10-15 cm, with the tip pointing upwards. A rule of thumb to follow is to plant the bulb three times its height deep. The distance between one bulb and another should be about 10-15 cm to allow good air circulation and prevent competition between plants.
An important aspect is to ensure good soil drainage : if the soil retains too much water, the bulbs can rot. You can improve soil drainage by adding sand or gravel to the bottom of the holes where you plant the bulbs. After planting the bulbs, it is useful to cover them with a layer of mulch to protect the soil from frost and to keep moisture constant.
Care and maintenance of tulips
Irrigation
During the winter, the tulip does not need much water, as cold soil naturally retains moisture. However, light watering immediately after planting is important to help the bulbs take root. In spring, when temperatures rise and tulips begin to bloom, it is important to keep the soil constantly moist but never soggy. An excess of water can cause bulb rot and the proliferation of harmful fungi, which is why we recommend the use of probes in home crops, a tool that is simple to use, but capable of providing valuable support in the correct management of irrigation.
Fertilization
Tulips are flowers that do not require over-fertilization, but benefit from the application of fertilizers. A good time to fertilize is in early spring, as soon as the first shoots begin to sprout. It is possible to use slow-release granular fertilizers or liquid fertilizers diluted in water such as liquid foliar fertilizer based on Potassium Phosphite Avoid fertilizers that are too rich in fast-release nitrogen, as they can stimulate excessive leaf growth to the detriment of flowers.
Would you like to receive our advice? Subscribe to our Newsletter - 8% discount now for you
|
Pruning and post-flowering care
After flowering, it is important to remove wilted flowers to prevent the plant from wasting energy in seed production. However, it is crucial not to cut the leaves immediately, as they continue to photosynthesize and store energy in the bulbs for the following year's flowering. The leaves can only be removed when they are completely yellowed.
After flowering, in summer, the bulbs can be left in the ground or removed and stored in a cool, dry place for the following year. If you decide to leave the bulbs in the ground, it is advisable to cover them with a layer of mulch to protect them from the summer heat.
Most common pathologies
Tulips, like all plants, can be susceptible to disease and pest attacks. Below are some of the most common problems in tulip cultivation.
Bulb rot
Bulb rot is one of the most prevalent diseases affecting tulips. It is caused by fungi such as Botrytis tulipae, which thrive in moist environments. Infected bulbs have brown, mushy spots and may not sprout. To prevent this disease, it is essential to ensure good soil drainage and not to overwater. In the event of infection, it is advisable to intervene immediately on the diseased bulbs with horsetail-based or copper-based foliar interventions to prevent the spread of the fungus.
Aphids
Aphids are small insects that feed on the linfa of plants and can cause deformations in flowers and leaves. These pests, in addition to weakening plants, can also transmit viral diseases. To combat aphids, natural insecticides based on Nettle or neem oil extracts can be used. Alternatively, the introduction of natural predators that are beneficial insects such as ladybugs (absolutely harmless to people) can be a truly sustainable and effective solution.
Tulip mosaic virus
Tulip mosaic virus is a viral disease transmitted primarily by aphids. Symptoms include streaks and spots on the petals, which may be decorative but weaken the plant. There is no cure for this disease, so the only solution is to remove and destroy infected plants. It is advisable to buy certified and healthy bulbs to prevent the onset of the virus.
To try to support this disease, it could be useful to use special biostimulant fertilizers that could support the plant to resist longer.
Fusarium
Fusarium is another fungus that can affect tulips, causing root rot and wilting of the plant. Again, drainage of the soil is crucial to prevent the spread of the fungus. It is possible to treat the soil with specific mycorrhizae fungicides or disinfect the bulbs in the early stages of vegetation with Cifoblok.
FAQs (Frequently Asked Questions) about tulip cultivation
When is the best time to plant tulip bulbs?
- The ideal time to plant tulip bulbs is in the fall, between September and November, before the ground freezes but when temperatures start to drop. The bulbs need cold to activate the germination process.
What is the right depth for planting tulip bulbs?
- Tulip bulbs should be planted at a depth of 10-15 cm, with the tip pointing upwards. The general rule of thumb is to plant the bulb three times its height deep.
How do you care for tulips after flowering?
- After flowering, it is important to remove wilted flowers but leave the leaves until they are completely yellowed. This allows the plant to store energy for the following year's flowering.
Do tulips need a lot of water?
- Tulips need moderate water. During the winter, cold soil keeps the root zone moist. In spring, it is important to keep the soil moist but not soggy, avoiding waterlogging.
Can I leave tulip bulbs in the ground after flowering?
- Yes, tulip bulbs can be left in the ground after flowering, but it is advisable to cover them with a layer of mulch to protect them from the summer heat. If you prefer, you can also remove them and store them in a cool, dry place for the following year.
Share this content









 Chronology
 Citrus fruits
 Turf
 Stone fruit
 Olive tree
 Ornamental
 Vegetables
 Actinidia (Kiwi)
 Screw
 Hobbies and insights
 Pome Fruit


